The all-in-one starter kit for high-performance SaaS applications.
Features
- Secure user management and authentication with Supabase
- Powerful data access & management tooling on top of PostgreSQL with Supabase
- Integration with Stripe Checkout and the Stripe customer portal
- Automatic syncing of pricing plans and subscription statuses via Stripe webhooks
Deploy with Vercel
The Vercel deployment will guide you through creating a Supabase account and project. After installing the Supabase integration, you'll need to configure Stripe with a few simple steps.
Note: We're working on our Stripe integration. We've documented the required steps below under "Configure Stripe" until the integration is ready.
Once the project has deployed, continue with the configuration steps below.
The initial build will fail due to missing Stripe environment variables. After configuring Stripe, redeploy the application.
Configure Supabase Auth
[Optional] - Set up OAuth providers
You can use third-party login providers like GitHub or Google. Refer to the docs to learn how to configure these.
Configure Stripe
To start developing your SaaS application, we'll need to configure Stripe to handle test payments. For the following steps, make sure you have the "viewing test data" toggle switched to "on."
Configure webhook
We need to configure the webhook pictured in the architecture diagram above. This webhook is the piece that connects Stripe to your Vercel serverless functions.
First, click the "Add endpoint" button on the test Endpoints page.
Then, set the endpoint URL to https://your-deployment-url.vercel.app/api/webhooks.
Next, click the receive all events link in the Events to send section.
Finally, copy the Signing secret as we'll need that in the next step.
Set environment variables
To securely interact with Stripe, we need to add a few environment variables in the Vercel dashboard.
NEXT_PUBLIC_STRIPE_PUBLISHABLE_KEYSTRIPE_SECRET_KEYSTRIPE_WEBHOOK_SECRET_LIVE
You can find the first two keys on the API keys tab in Stripe. The STRIPE_WEBHOOK_SECRET_LIVE is the Signing secret copied in the previous webhook configuration step.
Redeploy and Test
We need to redeploy the application so that the latest environment variables are present.
Redeploy your application by going to the deployments tab, finding your deployment, and clicking "redeploy."
Finally, click the Send test webhook button and send a product.created event. If everything works, you should see a test product in your Supabase database.
After verifying that the configuration is working, delete the test products created via the webhook in Supabase.
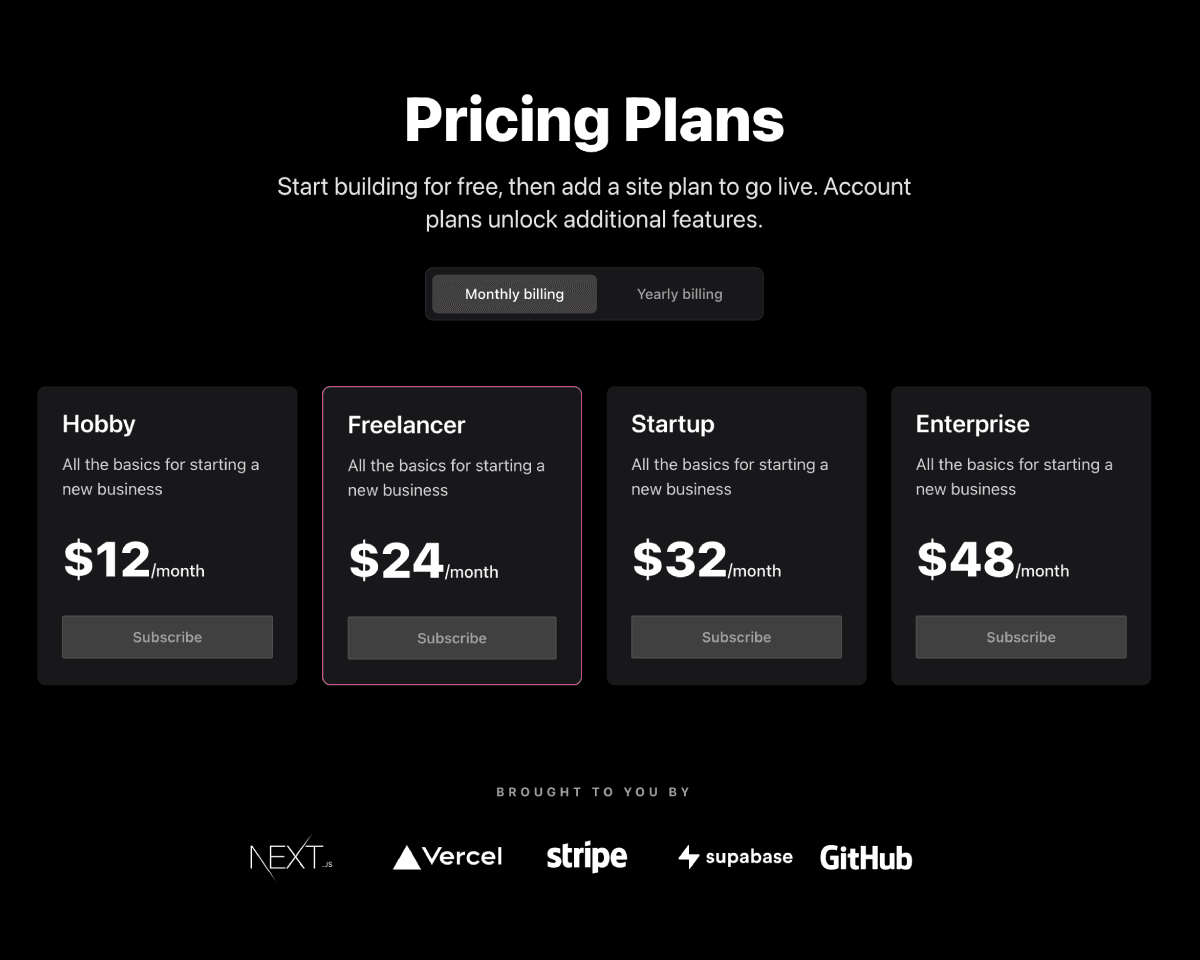
Create product and pricing information
For Stripe to automatically bill your users for recurring payments, you need to create your product and pricing information in the Stripe Dashboard. When you create or update your product and price information, the changes automatically sync with your Supabase database.
Stripe Checkout currently supports pricing that bills a predefined amount at a specific interval. More complex plans (e.g., different pricing tiers or seats) are not yet supported.
For example, you can create business models with different pricing tiers, e.g.:
- Product 1: Hobby
- Price 1: 10 USD per month
- Price 2: 100 USD per year
- Product 2: Freelancer
- Price 1: 20 USD per month
- Price 2: 200 USD per year
Generate test data with the Stripe CLI
The Stripe CLI fixtures command executes a series of API requests defined in a JSON file. To speed up the setup, we have added a fixtures file to bootstrap test product and pricing data in your Stripe account. Simply run stripe fixtures fixtures/stripe-fixtures.json.
Important: Be sure to start the webhook forwarding (see below) so that the products created by the fixtures command above are imported into your database.
Configure the Stripe customer portal
- Set your custom branding in the settings
- Configure the Customer Portal settings
- Toggle on "Allow customers to update their payment methods"
- Toggle on "Allow customers to update subscriptions"
- Toggle on "Allow customers to cancel subscriptions"
- Add the products and prices that you want
- Set up the required business information and links
That's it
That's it. Now you're ready to earn recurring revenue from your customers 🥳
Going live
Archive testing products
Archive all test mode Stripe products before going live. Before creating your live mode products, make sure to follow the steps below to set up your live mode env vars and webhooks.
Configure production environment variables
To run the project in live mode and process payments with Stripe, modify the environment variables from Stripe "test mode" to "production mode." After switching the variables, be sure to redeploy the application.
To verify you are running in production mode, test checking out with the Stripe test card. The test card should not work.
Redeploy
Afterward, you will need to rebuild your production deployment for the changes to take effect. Within your project Dashboard, navigate to the "Deployments" tab, select the most recent deployment, click the overflow menu button (next to the "Visit" button) and select "Redeploy."
Develop locally
Deploying with Vercel will create a repository for you, which you can clone to your local machine.
Next, use the Vercel CLI to link your project:
Setting up the env vars locally
Use the Vercel CLI to download the development env vars:
Running this command will create a new .env.local file in your project folder. For security purposes, you will need to set the SUPABASE_SERVICE_ROLE_KEY manually from your Supabase dashboard (Settings > API). Lastly, the webhook secret differs for local testing vs. when deployed to Vercel. Follow the instructions below to get the corresponding webhook secret.
Use the Stripe CLI to test webhooks
First install the CLI and link your Stripe account.
Next, start the webhook forwarding:
Running this Stripe command will print a webhook secret (such as, whsec_***) to the console. Set STRIPE_WEBHOOK_SECRET to this value in your .env.local file.
Install dependencies and run the Next.js client